How to Make a Simple Wormery
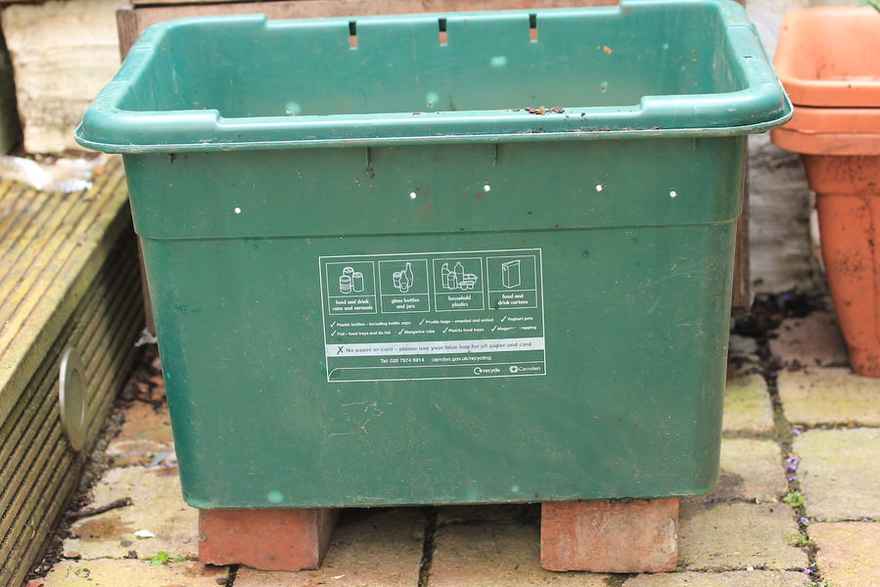
A wormery will recycle your waste food to make a superb fertiliser for your crops and a living soil in your containers. Wormeries are perfect for small spaces: they're small, don''t smell and make compost faster than conventional composters. You can either buy one (in the UK many councils offer them at discounted prices) or it can be fun and rewarding to make your own.
It's easy to make your own!
When I started growing I imagined that wormeries were complicated and hard to make. The truth is that they are simple and easy. Worms will be happy in any home that meets their basic needs: air, darkness, and moisture. It also shouldn't get too hot or cold. There are several ways to make a wormery. The easiest is to use an old plastic (or wood) box. Here's how to do it (I'll share other ways in the future).
What you need
To make a simple box wormery you'll need a shady space (under a bench or table is fine) for it to live and:
- A large plastic box with a lid (see below)
- A drill
- 2 bricks or pieces of wood to stand it on.
- Some newspaper or cardboard.
- Worms and worm bedding
How to make it
1. Find a large plastic box, with a lid (you can improvise a lid if it doesn't have one). If you can find a box that is UV treated it will last longer outside (most plastics designed for outside use eg recycling boxes will be OK). There is not really a minimum size – but the larger the surface area of your box, the more food waste you'll be able to feed it. Anything much smaller than 14 inches (35cm) in diameter will be quite limited.
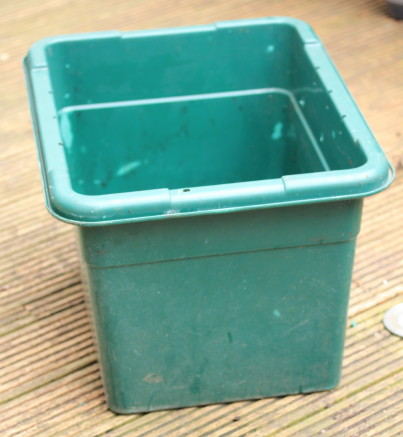
An old recycling box like this is perfect. These normally come with a lid but it's been lost so I will have to improvise. This one is a good size - 50cm x 35cm - but a bit smaller would also be OK.
2. Drill holes in the base of the box. Worms need air to breathe (just like us) – so drill enough holes to ensure a good air flow. I used a 1/2 inch (12mm) drill piece here – but any reasonable sized holes will do. (Just bear in mind that smaller holes are more likely to get blocked).
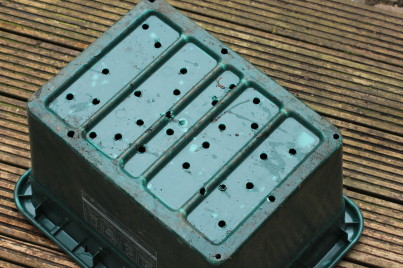
You want as much air as possible to get in. So the more holes you can drill - while keeping the integrity of the box intact - the better.
3. Put the box on bricks (or anything else that will do as 'feet') to ensure air can flow up in through the holes.
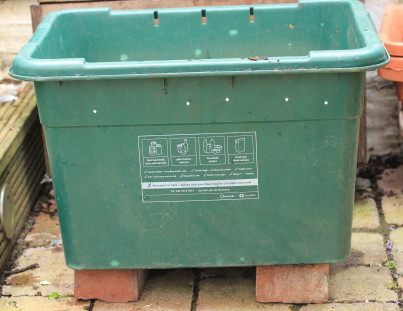
Standing it on bricks lets the air get to the air holes. No bricks? you can stand it on anything else you can find - like bits of wood.
4. Cover the bottom with a sheet of newspaper. This will help ensure the worms don't fall out! You don't need to build Fort Knox – the worms will only try to escape if they're unhappy - for example if it gets too acid inside (this can happen if too much onion or citrus is added).
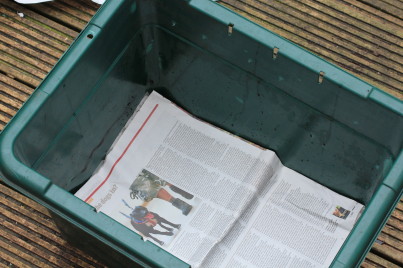
A layer of newspaper over the holes will prevent the worms falling out when you first put them in. You can put a drainage layer under this if you like - using eg stones or twigs - but this is not essential. It will improve the aeration, but it also has to be seperated from the worm compost when you harvest it which can be a bit of a hassle.
5. Drill small air holes in the lid and the side at the top. If you've got a sheltered place to put your wormery, you can drill plenty of holes in the lid to let air in. But if your wormery will be exposed to the rain, just drill a few - otherwise the box will get water logged in wet weather. You can add more holes to the top sides of the box instead. However you do it, the worms need a good supply of air – without letting in excessive amounts of light (worms need darkness).
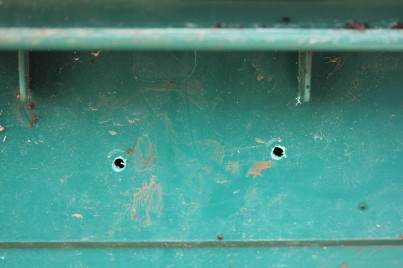
Drill a line of small air holes in the top sides of the box. You can also put holes in the lid - but not too many if the box will be exposed to the rain a lot.
6. Add about half a bucket of worm bedding - enough to cover about an inch in the bottom of your box. The bedding is what your worms will live in when you first put them into the box. You can use worm compost, home made compost, shop bought compost, or coir (coconut fibres) as bedding. The bedding is important to help your worms 'settle in' to their new home. They'll feel happiest in worm compost. That's because it contains all the microbes that they need. If you're lucky enough to have a friend with a wormery (see below) ask for some worm compost to use as bedding. Whatever bedding you use, make sure it is damp, like a rung out flannel.

This is partly decomposed worm compost from another wormery. It makes good bedding for worms. But worm compost is not essential - there are other alternatives.
7. Add some worms: You can get the right sort of worms on line, from a fishing tackle shop, or a compost heap. Even better, from someone you know with a wormery. An established, healthy wormery will contain several thousand worms. Collect 300 – 500 of these, or as many as you can. The more you start with, the faster your wormery will become productive (worms double their population about once every three months - so your friends wormery will return to full power again in just a few weeks). NB: earthworms – the worms you dig up in garden soil – are not suitable for wormeries.
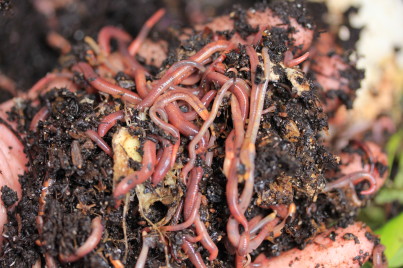
A common name for the worms you use in wormeries is Tiger worms. Various varieties are suitable. You only need one variety, but if you have more than one your wormery can be more efficient. Two common species used are: Dendrobaena venata and Eisenia fetida
8. Add a small supply of food: tea bags, banana skins, vegetable peelings, coffee grounds, are all good. If you chop it up, the worms will be able to process it faster (don't liquidise though). You can also add processed and cooked food to a wormery – but avoid adding in any quantity, particularly until your wormery is well established. Also avoid adding onion skins, citrus, very spicey or oily foods. As well as food waste, you need to add about 20 - 30% carbon rich matter - carboard, newspaper or wood chip.
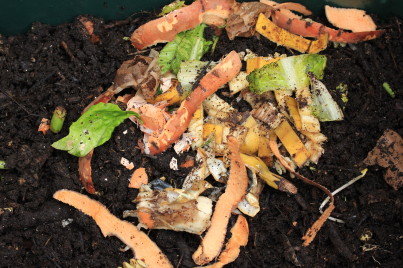
Vegetable peel, banana skins, pea pods, tea and coffee grounds, a bit of pasta - all good food for worms.
9. Cover the surface of the worms. Any old cardboard, newspaper or an old towel will do. This helps keep the light out and the moisture in.
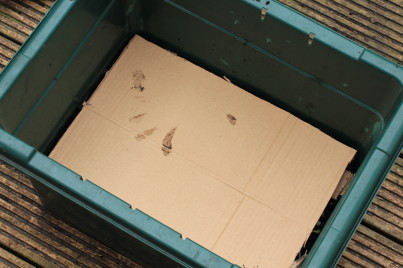
Here cardboard is being used as a cover - but an old T shirt, towel, or simply some newspaper will do the job just as well. I sometimes give it a quick watering to keep it damp.
10. Add the lid. I'd lost the lid for this box, so I'm improvising with an estate agents sign I found discarded in the road. I've sandwhiched two pieces of board together with a gap between them. I drilled holes in the bottom piece so that air can get in, but not in the top to keep it waterproof - at least that is the theory!
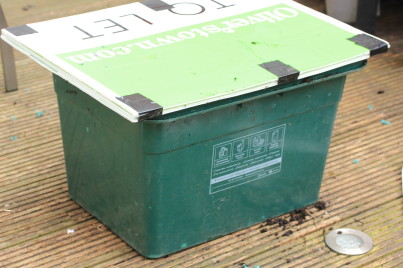
This lid is improvised from an estate agent sign. It's functional rather than beautiful - and I will be tucking this one out of sight under a small table!
That's it. All you need to do now is place it in a shady, sheltered spot out of direct sunlight. Feed it a little and often to begin with. Take care not to add too much food at one time or it will become smelly and unattractive to the worms (it putrefies). I plan to write more on caring for wormeries in the future - in the meantime, here's a piece, In love with worms, that I wrote a while ago with some ideas on what to feed them.
Making your wormery look attractive
I'd be the first to agree that this is not the most beautiful model! So you might want to tuck it out of the way eg under a table. Alternatively you could decorate the plastic box or put plant pots on the top. If you want a more attractive wormery, I'd recommend buying or making one from wood. Wooden wormeries can also double up as benches – and make ideal seating for small spaces. Wood is also a better insulator than plastic and it breathes better, too. But a plastic box will work fine and is so easy to make, that's why I chose to describe here. Here's a video of how you can do it! http://youtu.be/FxhVHM4eO6E

226 comments
I have a bin with the worms in that drains into another bin that catches the liquid. Have been using this liquid (diluted) as fertilizer & everything seems to grow better once it gets a dose of "worm juice". Hadn't thought about toxins, but so far, so good. Thanks for your helpful videos & info. cheers
in one of the older posts, you were asked 'how do I get the worms out of the compost?' your answer - 'you can put the compost 'in a riddle'...?
thanks
Karen Breslin
Can I use a bokashi bin for a wormery?
Leave a comment