How to look after and feed your wormery

(Including a downloadable worm menu - with gourmet treats!)
It's easy once you know how
Wormeries are easy to run once you get the knack - you just need a bit of practise and info to get you on the right track. I must confess to killing two whole colonies (traumatic days!) before I went to the library to get a book on how to do it. Here’s the essential, 'need to know' facts to avoid the common pitfalls. As long as you’re starting with a well designed wormery (an easy DIY one, here), there’s really only three things you need to do to keep it healthy: site it in a sheltered space, keep it moist, and most importantly, feed it carefully.
1. Feeding
Feeding is where things can most easily go wrong when you're starting out. Here’s the four golden rules
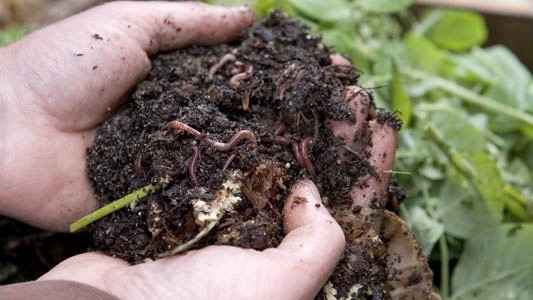
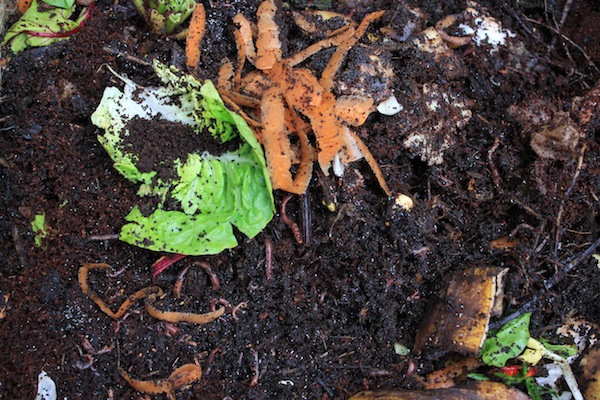
- Little at first: When starting your wormery, your first job is to feed it carefully and patiently while the worm population multiplies. You’ll probably have 300 – 500 worms in your wormery starter pack. But a mature, fully productive wormery has several thousand! Your worm population will double in size every two to three months, so it may take 12 - 18 months until your wormery is at full capacity. It’s better to add too little food than too much (particularly early on). Add too much and the food will putrefy (go off and get smelly). In optimal conditions, worms can eat about half their body weight a day. In cooler weather it will be a lot less.
- Add 20 – 30% carbon rich, ‘brown matter’ - that's cardboard, newspaper or wood chips - in addition to the food waste. Cardboard and wood chip will also help create air spaces in the wormery (worms, like us, need air).
- Don’t add any one ingredient in large quantities (particularly processed foods).
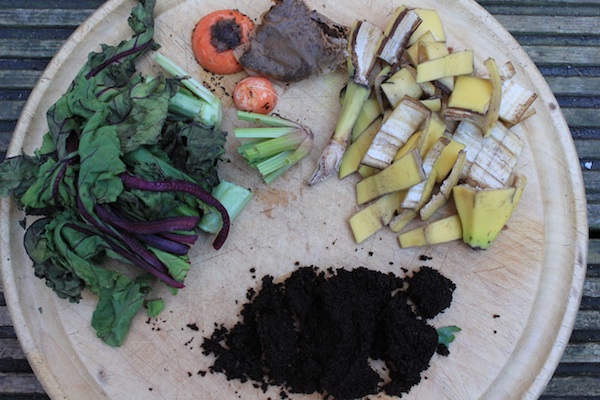
- Feed it a varied diet. This will help create a healthy wormery and a rich worm compost full of nutrients and trace elements – good things include banana skins and comfrey leaves (for potassium), coffee and nettles (for nitrogen).
How do you know when to feed? When you lift the lid of your wormery, can you see a few worms scouting round the surface? If yes, it needs feeding. If not, wait until you do. Usually you'll find they need feeding once or twice a week.
Worm Menu (including gourmet delicacies)
| Yes to: Mix about 20-30% carbon rich (brown font) with 70 – 80% nitrogen rich (black). | Gourmet delicacies Add when you find – none are essential. | OK (in moderation) to: Wise to avoid completely until your wormery is established. | No to: |
| Fruit peelings (worms love banana skins – a good source of potassium) | Composted manure (add a 1 or 2 inch layer every 6 weeks) – adds valuable soil life. Worms love it! | Onion skins (too acidic) | Meat and Fish – these will be broken down in a wormery but may spread disease eg BSE. |
| Veg peelings eg potatoes, carrot, (not onions) | Garden soil (just a handful here and there) – adds grit for worm gizzards and soil life. | Citrus (too acidic) | Dog / cat pooh |
| Cardboard – tear up in small pieces, and sprinkle with water to dampen it. | Nettles – chop up and add a layer occasionally – rich in nitrogen and trace elements. | Oily food | |
| Newspaper / waste paper – shredded. | Comfrey leaves – chop up and a layer occasionally – rich in potassium and trace elements. | Spicy foods | |
| Wood chip - composted if possible. (Avoid fresh pine wood chip) | Liquid seaweed fertiliser – adds trace elements and promotes soil life. Effective but expensive and far from essential. | Anything very salty (eg fresh sea weed) | |
| Coffee grounds and tea bags. | Fine sawdust | ||
| Leftover cooked foods (avoid adding in large quantities) | Grass cuttings | ||
| Bread, rice, cereals, pastries, cake | Garden waste | ||
| Egg shells – crushed | Processed food | ||
| Green waste compost | Cheese | ||
| Cut flowers |
You can also see or download this menu here from Google Docs.
Holiday feeding
Worms are quite happy for two to three weeks without feeding. Don’t add excess food before you go away, as this may become rancid. Feed them as normal, perhaps adding extra damp cardboard and / or a layer of green waste compost or manure (this will provide food for the worms but won’t go off).
2. A sheltered site
Worms do best in a constant temperature, not too hot or too cold. A shady is spot is best (15 – 25 oC is optimum). If possible, it’s also good to place it somewhere protected from strong winds (to avoid it getting too cold) and rain (to minimise risk of flooding, see tip below). Tip: If your wormery will be rained on, leave the worm juice tap (if there is one) open with a collection jug underneath. This will help prevent flooding and possible mass worm extinction.
3. Keep the wormery damp
A healthy worm bin should be damp (like a squeezed out flannel) not dry or wet. Water lightly if it gets too dry. Add more paper and card if too wet.
Trouble shooting
The wormery should smell sweet and healthy. An unpleasant smell is a sign that something is wrong. The two most common causes of a bad smell are: 1. Overfeeding leading to putrefaction of uneaten food. Solution: feed less. 2. Adding too much green matter and too little brown matter. Solution: add more torn up card or newspaper or wood chippings. That's it! Do you have any other wormery tips or stories to share?


271 comments
Hi Mark. Thanks for all your interesting info. I bought a tiered wormer which is stacked with worms but I can’t get them to move up to the next level so my 3 tiers are almost full of beautiful looking compost but also full of worms so I can’t use it. Tried picking them out but just far too many of them. Any tips?
Thanks
Wendy
My bottom box on the wormy is empty how do I rectify this without hurting the worms in the 2 top boxes
Leave a comment