How to make your own moveable raised bed - step by step
Here's how to make your own moveable raised bed / large container using recycled materials - all for just a few pounds or dollars. Add a lick of paint to the outside and you'll create a stylish container to rival any you can buy!
The benefits of making your own containers
When you make your own containers you can design them to fit your space exactly: perfect for when every inch of space is valuable. Large containers, suitable for veg growing are also hard to buy or expensive. Making your own can save you money and is an opportunity to give new life to recycled materials.
Why make LARGE containers?
The general rule with containers is that bigger is better - if space and weight holding capacity permits. Bigger containers hold more soil, food and water. This results in bigger, more productive, healthier crops. They are also easier to look after, requiring less regular watering and feeding.
Safety Note for balcony and roof terrace growers
As you are probably aware, weight is an important consideration, but I need to remind ourselves about this. Filled with soil, large containers can weigh many kilos / pounds. Always check that your roof terrace or balcony can hold the weight.
What you need
Tools
- Saw
- Set square for marking straight perpendicular lines (many hand saws can also be used as set squares).
- Drill
Materials
- Old scaffold boards (source these from scaffold companies - they have to replace their boards every few years by law. You can also often find them at allotment sheds, timber recycling projects or on Ebay).
- Discarded estate agent boards.
- Wooden battens to attach base (wood from old pallets is ideal).
- 2inch x 2 inch wood to join corners (estate agent posts will do the job).
- Screws - non rusting
- Plastic to line the inside (old compost bags are ideal) and prolong the life of the wood - optional.
- Paint or varnish to spruce up the outside - optional. If you want to paint the inside, make sure you use a food safe paint like Osmo...
How to make it
1. Cut the planks to length you require to fit your space. (As large containers are very heavy when filled with soil, take care not to make them too big or, as I once found out, you won't be able to move them!). 2. Attach the 2 x 2 (5cm x 5cm) to the corners on two sides of the wood, leaving a gap at the end the same thickness of the scaffold plank you're using. (To make a deeper box you could join two scaffold boards together).

The scaffold boards are cut to size and lengths of 2x2 are screwed on, leaving a gap for the side panels to slot in. The 2x2 makes the boards easier to join together, and the joint stronger.
3. Attach the sides to complete the frame of the box. This job is best done on a flat surface and is easier if you can borrow a second pair of hands to hold the wood in place.
4. Cut an estate agent sign (or two) to fit the size of the box. This will be the base. I use these signs because they are light, strong, and long lasting. If you can't find an estate agent sign, you could line the bottom with strong weed suppressant fabric or make a wooden base.

Old, discarded estate agent signs are cut to fit the size of the box (two have been used here), and held in place at this stage with a few screws.
5. Cut several battens the same width of the box (here, I've used pieces of old pallet). Use the battens to attach the plastic base, by screwing through the battens. The battens have two functions - they hold the plastic firmly in place, and they raise the container from the ground enabling it to drain properly.

Using the battens helps to fix the base firmly and securely, and raises it above the ground to aid drainage. Holes have been drilled in the base for drainage.
6. Drill plenty of drainage holes (1cm / 0.4 inch diameter is ideal if you have such a drill bit - if not, use the largest you have) in the plastic base (see image above). 7. Line the inside of the box with old compost bags if you want to preserve the life of the wood. Even without lining, the box should last several years, and you may prefer to grow in a more natural environment without plastic. (I've lined this one with plastic, but find I'm increasingly prefer to grow in natural materials). 8. Finally, if you chose, you can give the outside a lick of paint. As this container was destined for outside our front door I painted it a smart black in an attempt not to lower the tone of the neighbourhood! I used Osmo Country Colour wood paint, which is the most natural paint I've been able to find.

The box has been lined with old compost bags to preserve its life and the outside painted black to smarten it up for growing in public view. Now all it needs is filling with soil.
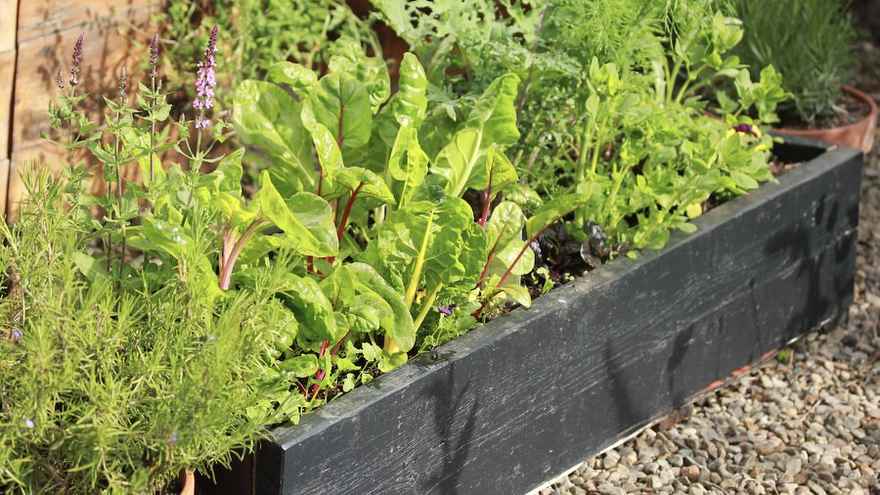
And here it is a few months later filled with chard, kale and phacelia.

9 comments
Leave a comment