How to grow oyster mushrooms at home
Have you ever wondered if there’s an easy way to grow mushrooms at home - without needing to buy a new kit each time?
To find out, I went to visit mushroom expert, Ivan Lucas, who runs Mushroom Box.
Ivan explained that the choice of the mushroom you grow is critical to success. The easiest are the oyster mushrooms. These will grow happily and prolifically inside the home, in very little space (even under your bed!) on chopped straw, cardboard, old cotton clothes, unbleached paper - or a mix of any of these. Coffee grounds can also be used but are more difficult because they easily go mouldy.
While the easiest media to grow on is chopped straw, this may be difficult for some of you to get hold of in small quantities in your city (at least, it is where I live). So I asked Ivan to show us how to use waste card, which IS usually in plentiful supply.
Here's what you will need to grow oysters on cardboard:
- space to put them - about the size of a medium cardboard box is plenty.
- daylight (while they are fruiting - enough to read a book by)
- warmth (anything from 10 - 250C, depending on the variety of oyster mushroom)
- a water spray bottle to keep them moist.
- a kettle.
- a supply of cardboard
- a large plastic bag or two.
- a bucket or bowl that will hold boiling water
- mushroom spawn - you want a supplier who sells the spawn on its own (without having to buy a whole kit) - Mushroom Box in the UK is the one I use.
There are many varieties of oyster mushrooms. Two good choices of oysters to grow first are:
- Blue grey oysters. These are the easiest and one of the highest yielding. They also grow in cooler temperatures than some - anything between 10 and 20 0C (50 - 680).
- Pink oysters (in pic above). As well as being a stunning colour, these are one of the fastest growing mushrooms, producing fruits in as little as three or four weeks. They are a tropical mushroom and need a warmer temperature - something between 18 and 27 0C. If you have a warm house you may be able to grow them in winter.
https://youtu.be/Qfk95bI-jhs
Here are Ivan’s step by step instructions:
Step 1: Pasteurise the cardboard
In order to give your oysters a good start, and reduce the risk of the card becoming contaminated with mould, you will need to kill most of the other micro organisms that are living on your cardboard. You can achieve this by soaking it in boiling water - a simple but effective technique known as pasteurisation. (Oyster mushrooms are what is known as ‘primary decomposers’ - this means that they are one of the first organisms to move in when a tree or plant has died. It also means that they are not good at competing with other moulds and bacteria - which is why pasteurisation is so important).
- Prepare your cardboard. Egg trays need no further preparation (see video); but if you are using cardboard boxes you'll want to either cut the card into similar sized squares (layer the mushroom spawn between the squares) or tear into strips.
 If you cut your cardboard up into squares, you can sandwich the spawn between each layer after pasteurisation (in the same way Ivan does with the egg trays in the video).
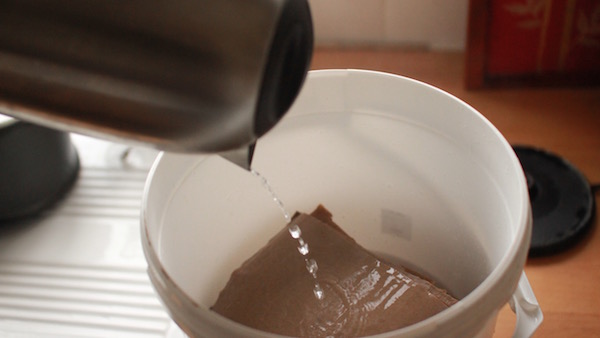
- Then put your cardboard in a heatproof container (a bucket, bowl or strong, heat resistant plastic bag), boil the kettle, and pour hot water over the cardboard until it is completely covered (if you press the card down you will find you can do this with less water). Put a lid on the bucket and leave it to cool completely - for eight hours or overnight.
 Soaking the cardboard in boiling water is vital to kill off contaminating organisms. Make sure the water is completely cool before adding the mushroom spawn.
Step 2: Inoculate with spawn
- Once completely cool, drain as much of the water off as you can - squeeze the cardboard to remove the excess. Your media is now ready for inoculation with the spawn.
- Cleanliness is important at this stage to avoid contaminating the cardboard again - wash your hands with an anti-bacterial wash or soap before handling the growing media or spawn.
- If using egg trays or squares of card, pile them up in a layer, putting a few spawn between each layer (see video).
- If using cardboard strips, put the strips in a clean plastic bag and mix the spawn through them. The better you mix them, the faster your spawn will colonise. Then cut eight cross hatch slits in the sides of the bag (each slit about 1 inch long). This is where the mushrooms will grow later on.
Your mushrooms are ready for step 3, colonisation.
Step 3: Colonisation of the cardboard
In this step the mushrooms are left in a warm place for a few weeks to colonise the cardboard.
- Put the egg trays or bag of card strips into another larger plastic bag (eg a bin bag), without holes in the bottom. Close this to exclude the fresh air. Carbon dioxide will build up inside the bag and this will stimulate the mushroom to grow through the cardboard.
- Then put this bag in a warm place - it needs to be at least 10 0C for blue grey and 180C for pink oysters, but they will colonise faster in a warmer place like an airing cupboard.
- After a couple of days, open the bag just to check that no pools of water have collected at the bottom (moisture is good, but pools of water are not). If you find excess water, pour it out.
- Close the bag up again and put it back in a warm place for 3 - 4 weeks (pink oysters) and 4 - 6 weeks (blue-grey). They do not need light during this stage. You can just leave them during this time. You might want to put a reminder in your diary or phone so you don’t forget about them completely!
Step 4: Fruiting - first flush.
Once fully colonised- Open the outer plastic bag so that air can reach the egg trays or the bag containing the cardboard strips. The oxygen will stimulate the mushroom to fruit.
- Move it to a light place - it needs light to fruit (the rule of thumb is enough light to read by).
- Spray with water regularly with a spray bottle, ideally twice a day. Avoid spraying the mushrooms directly. Instead spray the inner walls of the outer bag (Ivan demonstrates this in the video). This will help create a moist atmosphere that the mushroom needs to fruit. If moisture levels are not high enough, the mushroom will not fruit or baby fruits may die.
- After a few days, you will begin to see baby ‘pin mushrooms’ of the ‘first flush’ form. These will grow fast into full sized mushrooms in just a few days.
 Baby blue-grey oyster mushrooms emerging from egg trays. At this stage they are called "pins"; with enough light and moisture they will grow to full sized mushrooms in just a few days.
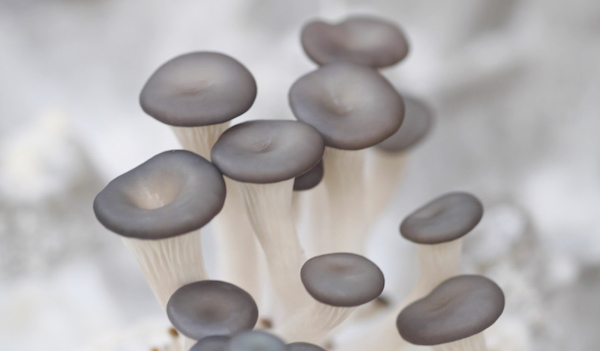
- Aim to harvest the mushrooms before the edge of the mushrooms go wavy - but don’t worry if they do as they are still fine to eat (the pink mushrooms pictured at the top of the page have a wavy edge and are just past their best - but still very good to eat).
- Harvest the mushrooms by twisting the fruits off the bag - avoid tearing them as you may damage the mycelia.
- Enjoy eating them. Don't forget that the stems of oyster mushrooms can be tough and almost inedible, so make sure to remove these before cooking.
 The colour of blue grey oyster mushrooms depends on the temperature - in cooler temperature they will be bluer than the above. These were grown on straw but otherwise using a similar method.
Step 5: Fruiting - later flushes
After the first flush,- Keep spraying the mushrooms with moisture once or twice a day, and keep them in a light place. After ten to fifteen days (sometimes a bit longer) you should get a second flush of mushrooms. This is usually as large and sometimes larger than the first flush.
- Continue spraying the mushrooms and you may also get a third, fourth and even fifth flush at two or three week intervals. These later will usually be progressively smaller.
- When the mushrooms have finished fruiting, add the spent straw to your compost heap or wormery if you have one. You might even get another flush of mushrooms.

57 comments
Obsessed with my grow-your-own mushroom kit! It's amazing to see the transformation from spores to fully grown mushrooms right before my eyes. A must-have for any home chef!
Leave a comment