How to grow Orach in containers

Red orach is a wonderful salad and leafy veg to grow in containers. It’s colourful, good to eat and grows tall, adding attractive height to a container garden. The variety, orach scarlet emperor, has vivid magenta leaves and is one of my favourites. It's a cheerful addition to the container garden and will brighten any salad. Eaten raw, it has a mild but excellent taste. Once cooked, the larger leaves taste similar to spinach. Orach is grown can be grown as either an attractive microgreen or as full sized plants.
How to grow full sized orach plants
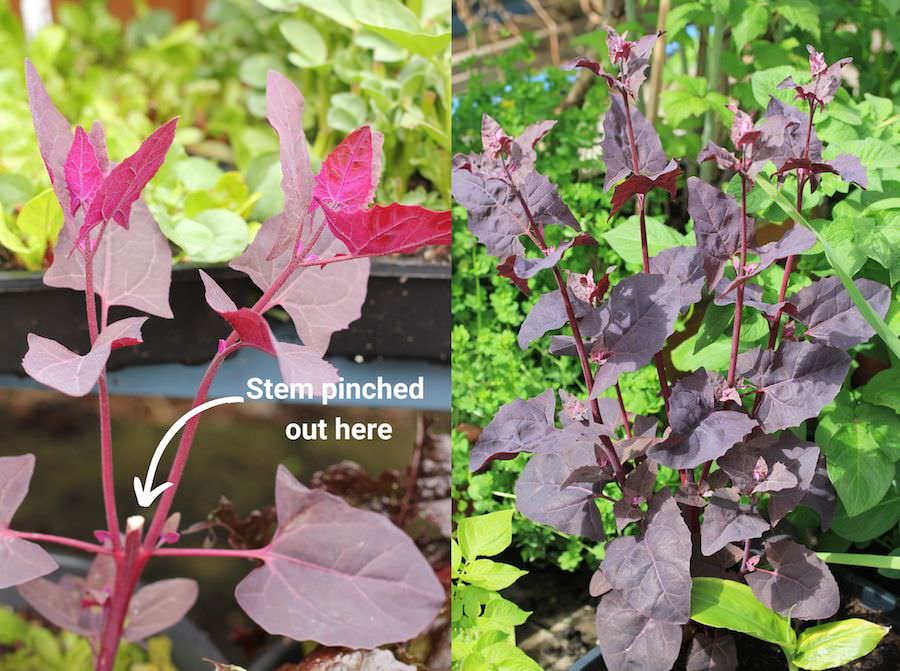
Orach is one of the easiest salads to grow and only needs three to four hours of sun (it will also grow happily in more sun, of course). Choose a container at least 5 litres / 1 gallon in volume - the larger the container, the bigger the plant will grow. Then sow the seeds about 1 inch (2cm) apart. As the seedlings come up and grow, thin out the plants (‘thin out’ is gardening language for removing some of the plants) so they are between two and eight inches (5 - 20 cm) apart. The more space you give each plant, the larger each one will grow. Left to its own devices, orach will now grow on one main stem, and form a tall, thin plant. That's fine if that's what you want. However, it can be easily encouraged to grow more bushy. Simply pinch out the main stem (with your fingers or a pair of scissors), just above a pair of leaves (known as a leaf node). Two new stems will form from the leaf node. If you do this two or three times (pinching out each new stem above a leaf node), a bushier plant will soon form, and each new branch will increase the number of baby leaves you get. The baby leaves are the prettiest and tastiest for salads.
 Left: the main stem has been pinched out and you can see two new stems growing. Right: A bushier plant growing from a pinched out plant.[/caption] If you leave the plants to go to seed they can continue to look attractive. Once dried out, we often pick a few stalks and put them in a vase inside we like them so much. And, even better, after this, you can shake off all the seeds to grow next year! I collect a bag of these seeds every year and use them to give away and to grow microgreens.
 Once gone to seed, orach makes a nice autumnal flower arrangement. Left: freshly picked. Right: once dried the seeds can be stripped off and used next season - perfect for growing microgreens.
How to grow orach microgreens
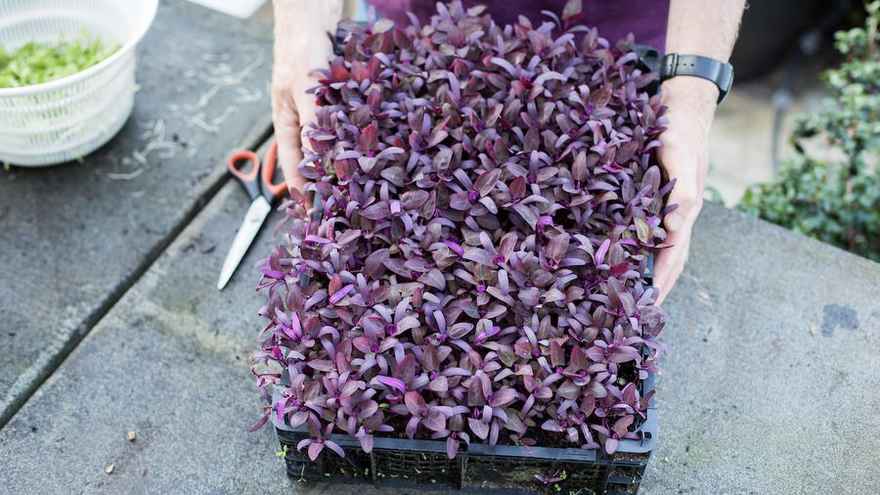
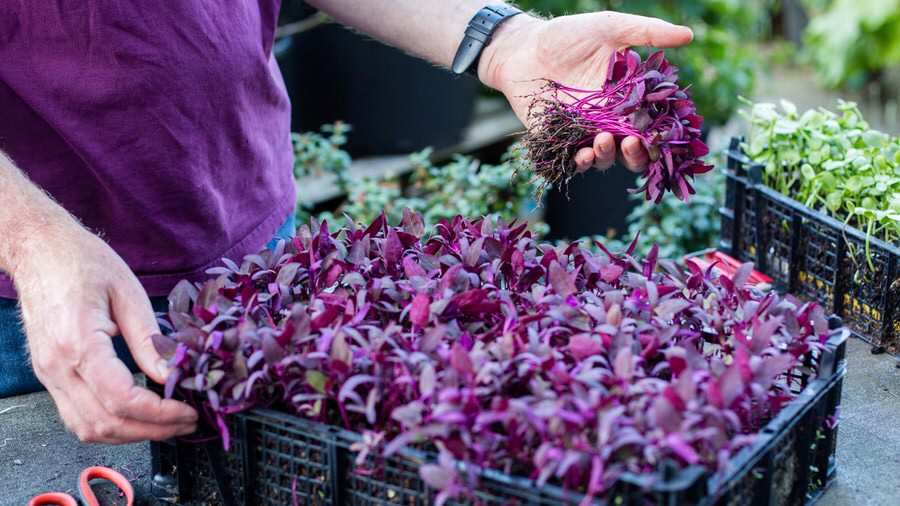
Orach is also easy to grow as a microgreen, one of the prettiest microgreens out there. Sow the seeds close, almost touching in a seed tray or similar, and cover with a thin layer of compost. They should be ready to pick after two to four weeks depending on the temperature. To harvest, either thin them out to create more space for the remaining plants to continue to grow. Or cut them with scissors. As with other microgreens you do need a lot of seeds for each tray - and it's not really economic to use seeds from small seed packs. Luckily orach is one of the easiest crops to save seeds from, see above. If you plan to save seeds, it's best to grow it in a larger container (say 20 litre / 4 gallons) so that it can grow into a big healthy plant.
 Thin out Orach microgreens by removing seedlings evenly across the tray. This makes space for the remaining seedlings to keep growing.

7 comments
Thanks for this detailed lowdown. Will get sowing tomorrow!
Leave a comment