How to Make a Growing Ladder - and Grow More in a Small Space
Imagine transforming a cramped balcony or a tiny yard into a lush, vertical garden. Growing ladders are a wonderful way to make this a reality.
The many benefits of Growing ladders
Growing ladders are a simple and highly effective because:
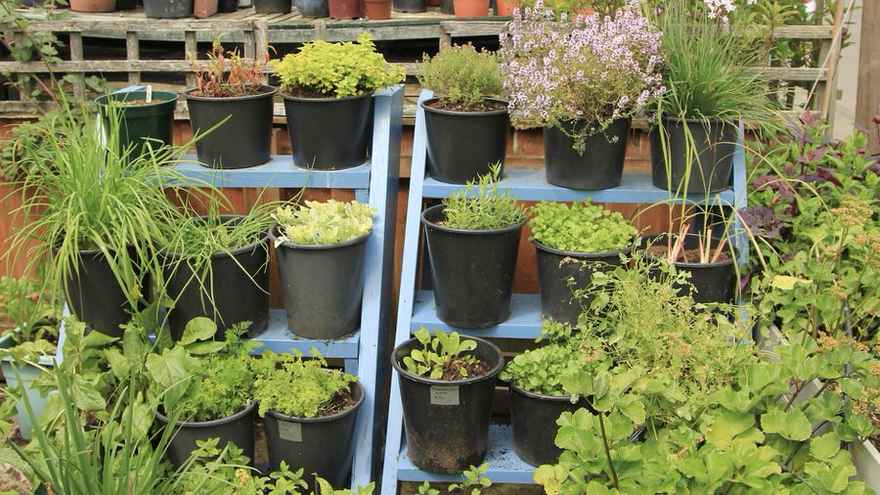
- They make excellent use of both vertical and horizontal space. Where you once had three pots, you might fit twelve pots on a growing ladder with three shelves (three on the ground and three on each shelf).
- The higher shelves will often get more light than pots on the ground. This is particularly useful in less sunny spaces - for example yards with walls around them.
- They help keep pots tidy and organised. And they look better on different levels.
- Their freestanding design makes them movable and versatile, ideal for rental properties.
- They create storage space behind - useful for keeping bags of compost or spare pots.
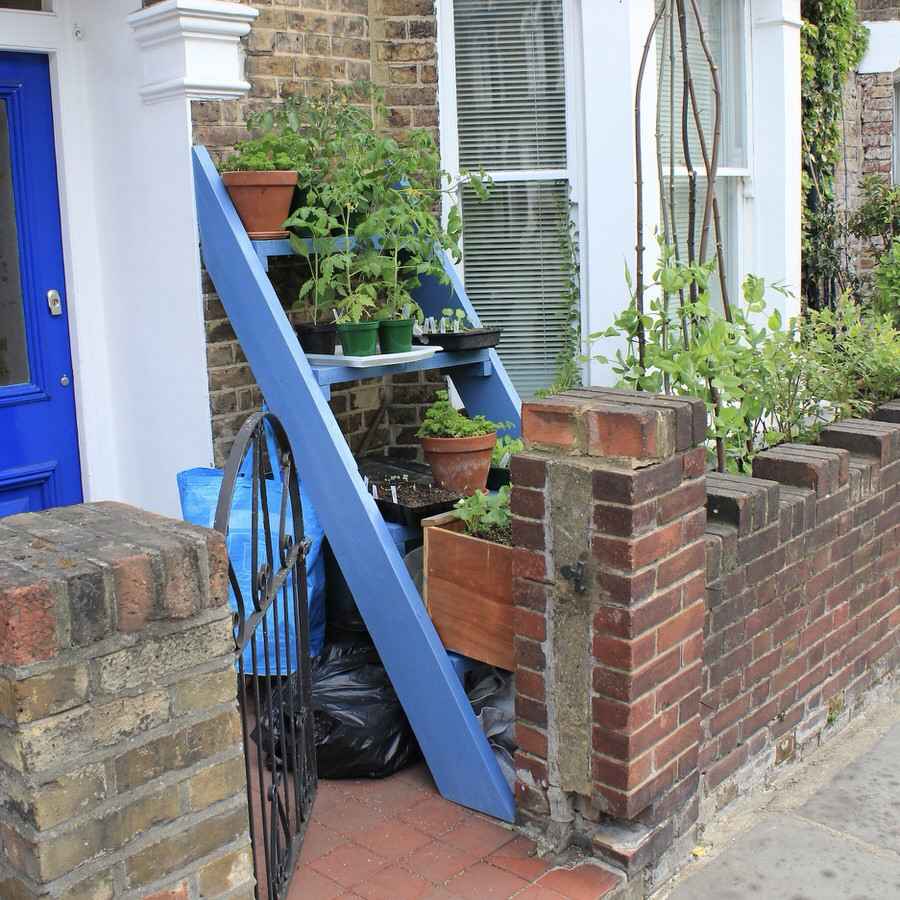
The first growing ladder I made, using wood found in a skip. This transformed a sunny, south facing space where the communal bin lived into an excellent and productive growing space. In the summer I grew chillies on the top shelf and they did really well!
Buy or DIY?
You occasionally see growing ladders for sale (sometimes called 'allotment ladders' or 'plant theatres'). However, the benefits of making your own are that:
- You can make the shelves to the exact size to fit your pots.
- You can design it to fit neatly into your space.
- You can make it with one, two, three or even four shelves, depending on what you want to grow. For low plants like herbs and salads, the shelves can be quite closer together. For taller plants, like potatoes, leave more space between shelves.
- You can use reclaimed timber - and if you are lucky, you may even find it for free in a skip (always ask before taking - as skip contents still belong to the owner!).
If you're confident doing a bit of woodwork, they are not too difficult to make - see how in the video below.
Step by Step Video Guide
This video walks you through how I make one.
Additional Building Tips
- As with all carpentry projects, I highly recommend drawing a scale plan before you get the wood cut to size. Otherwise, for example, it is easy to find that your uprights, because they lean at an angle, are a bit shorter than you need!
- Painting the wood with preservative will give it a longer life. Pay particular attention to the ends where the grain is - as this is where water often gets in. For this reason, I always paint the ends of the shelves before screwing it together. Raising the legs a little off the ground, for example with a tile, can also help to keep them out of water in heavy rain, and prolong the life.
- Always check the ladder is secure, stable and can't slip, before putting the pots on.
- Fix the shelves and the battens with screws designed for outdoor use so that they won't rust. Decking screws or stainless steel screws are two types that are commonly available.
- If the ladder will be in a placed where it is exposed to strong winds you might need to either secure your pots (eg with wire to hold them on) or use larger, heavier pots that will not blow off. Even though my yard is quite exposed, I have not found this to be much of an issue. I'm just mentioning it as it is something to be aware of, particularly if pots could fall off and cause damage.
Materials and Tools
- Wood for the shelves and uprights. Ideally cut to size if you can find a wood merchant to do this (this makes the construction much easier, particularly if you are using hand tools). I make mine from old scaffold boards, which are 3.8 cm thick x 22 cm wide (1.5 inches x 8.5 inches) - but any reasonably strong boards will do.
- Wood for battens to hold the shelves in place - I use 2cm x 2cm (3/4 inch) lengths of weather treated wood.
- Screws for external use (you want ones that won't rust). External paint or preservative
- Tape Measure
- Hand saw for cutting the angles.
- Drill
- Screwdriver
- Pen or pencil for marking
- A spirit level and a work bench are useful but not essential
Share Your Experience....
Do let us know how you got on in the comments... any additional tips you can offer others building one? Or any challenges and how you overcame them? Also, if you can add a photo (click on the paperclip icon), we can all be inspired by what you achieved!
1 comment
Make them all the time - the first one's the hardest.
Recommendation: include a flat to the ground footer board - paint and seal it before nailing it on. Keeps the ladder sides up from the ground and rotting out.
Leave a comment